How do you install LED strip lights on a high ceiling?
Share
Installing LED strip lights on a high ceiling can be a bit tricky, but with the right tools and approach, it’s definitely doable! Here’s a step-by-step guide on how to safely and effectively install LED strip lights on a high ceiling.
Tools and Materials You’ll Need:
- LED strip lights (with the correct length and type)
- Power supply/transformer (suitable for the wattage of your strips)
- Adhesive backing (usually comes with the LED strips)
- Mounting clips or brackets (for additional support)
- Measuring tape or ruler
- Ladder or scaffolding (for reaching the high ceiling)
- Drill (if you need to use screws or anchors)
- Screwdriver
- Cleaning supplies (like wipes or a microfiber cloth)
- Extension cord (if necessary for power supply)
- Soldering kit (if you need to connect or extend the strips)
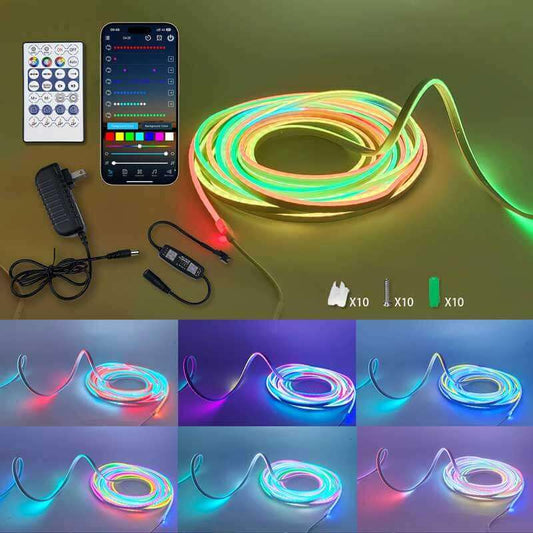
- Smartphone/Remote control (if you’re using smart LED strips)
Step-by-Step Guide:
1. Plan Your Installation Location
- Measure the area: Use a measuring tape to determine the length of LED strip lights you’ll need. Be sure to account for any corners or angles if you're running the strip around the perimeter of the ceiling.
- Choose the mounting position: Typically, LED strips are installed along the edges of the ceiling where it meets the walls, or inside coves or recessed areas. This gives the best effect and prevents direct glare.
- Check wiring locations: Ensure that the power supply will be conveniently placed near a power outlet or prepare for an extension cord if necessary.
2. Clean the Surface
- Prep the ceiling: The surface where you will be mounting the strips must be clean, smooth, and free of dust, grease, or debris. Wipe it down using a microfiber cloth and a mild cleaner.
- Allow the surface to dry completely before proceeding.
3. Measure and Cut the LED Strip (if needed)
- Measure your LED strip against the ceiling to determine where you need to cut or adjust the length.
- If the strip has cut points (usually marked with lines), cut the strip carefully using scissors. Be sure to cut only at the marked spots to avoid damaging the LEDs.
4. Mount the LED Strips
- Peel off the adhesive backing from the LED strip (if your strip has adhesive backing).
- Stick the strip along the chosen ceiling edge, ensuring it is aligned properly. Press it firmly to avoid air bubbles and to ensure good adhesion. If you're working with a particularly high ceiling, make sure the strip is securely pressed into place before letting go.
If the adhesive isn’t strong enough or you’re concerned about it coming loose:
- Use mounting clips or brackets to help hold the strip in place.
- You can also use command strips or 3M adhesive to reinforce the strip without leaving damage.
For longer strips or heavy-duty applications, it's better to use screws or anchors to secure the strip brackets or mounting tracks in place.
5. Install the Power Supply
- Connect the power supply to the LED strip according to the manufacturer’s instructions. This will typically involve connecting a connector to the strip and a plug to the power supply.
- If necessary, use a soldering kit to connect the wires properly, especially if your strip needs to be extended or you’re connecting multiple strips.
- Place the power supply somewhere accessible but out of sight, such as in a wall-mounted cabinet, ceiling cavity, or high shelf.
- If your strips are smart LED strips, you may also need to connect a smart hub or remote receiver to control the lights wirelessly.
6. Test the Lights
- Once everything is connected, turn on the power supply and check if the LED strips light up.
- If they don’t work, double-check the power connections and ensure everything is connected properly. You can also try switching to a different outlet or power source.
7. Hide the Wires
- Neatly route the wires to avoid visible clutter. You can use cable channels, wire concealers, or tape to secure the wires along the edges or hidden in the corners.
- If possible, tuck the cables inside cove lighting or other hidden areas to keep the installation sleek.
8. Adjust the Lighting (Optional)
- Smart strips: If you’re using smart LED strips, connect them to your smartphone app (e.g., Google Home, Alexa, or brand-specific apps like Govee or LIFX) for easy control. Set the brightness, colors, and timing according to your preferences.
- Manual dimmers: If you're using a manual dimmer switch, connect it between the power supply and the LED strips to adjust brightness.
9. Enjoy the Ambience!
- Now, step back and admire your work! With your LED strip lights installed on the high ceiling, you’ll have a beautifully lit room with a cozy, ambient glow. You can also experiment with color settings or dimming options to create the perfect atmosphere.
Tips for Installing LED Strips on High Ceilings:
-
Use a Stable Ladder or Scaffolding: If your ceiling is very high, make sure you use a tall ladder or scaffolding to safely reach the installation area. Never try to stretch too far or work in an unsafe position.
-
Consider Using LED Channels: Aluminum LED channels can be mounted to the ceiling to house the LED strips, providing a cleaner look and protecting the strips from dust or damage.
-
Use a Partner: Having a second pair of hands will make it easier, especially when aligning the LED strip on a high ceiling. One person can hold the strip while the other ensures it’s attached correctly.
-
Control Access: If you’re installing LEDs on a high ceiling for ambiance or decorative purposes, using smart LED strips gives you the flexibility to control the lighting from anywhere using your phone.
By following these steps, you can install LED strip lights on your high ceiling in a safe, efficient, and aesthetically pleasing way. Enjoy your new ambient lighting


