How do you stick LED strips to the ceiling?
Share
Sticking LED strips to the ceiling is a simple, affordable process that you can do without much effort or professional help. Here's a step-by-step guide to help you install your LED strip lights on the ceiling easily, with minimal cost.
Materials You’ll Need:
- LED Strip Lights (Ensure the length fits your ceiling or is cuttable)
- Adhesive Backing (Most LED strips come with this)
- Measuring Tape (For accurate placement)
- Scissors (If you need to cut the LED strip)
- Optional: Mounting Clips or Hooks (If you want extra security)
- Power Supply (Make sure it's rated for the length and voltage of your LED strip)
- Extension Cord (If you need to plug the lights into a far-away outlet)
Step-by-Step Guide to Stick LED Strips to the Ceiling:
Step 1: Measure and Plan the Layout
- Use a measuring tape to determine where you want to place the LED strips. Common areas include:
- Around the perimeter of the ceiling.
- In the corners for accent lighting.
- Along cove ceilings or tray ceilings for indirect lighting.
- Mark the area with a pencil or tape to ensure a straight and consistent alignment.
Step 2: Clean the Ceiling Surface
- Wipe down the area where you’ll stick the LED strips with a clean cloth to remove any dust, grease, or dirt. This ensures the adhesive sticks well.
- If the ceiling is textured or rough, the adhesive may not stick properly, so it's important to clean it thoroughly.
Step 3: Prepare the LED Strip
- If your LED strip is too long for the space, use scissors to cut the strip at the designated cut lines (usually indicated by scissor icons on the strip).
Step 4: Peel Off the Backing
- Most LED strips come with self-adhesive backs. Carefully peel off the protective layer to expose the sticky adhesive.
- Make sure not to touch the sticky side too much, as it may reduce the adhesive's effectiveness.
Step 5: Stick the LED Strip to the Ceiling
- Start at one end of the space and press the LED strip against the ceiling slowly, following the path you've planned.
- Press down firmly along the entire length of the strip to ensure it sticks securely. This will prevent it from sagging or peeling off over time.
Step 6: Power Up the LED Strips
- Once the strip is in place, connect the LED strip to the power supply.
- Plug the power supply into the nearest power outlet. Make sure the power supply is compatible with your LED strip’s voltage and wattage requirements.
Step 7: Test the Lights
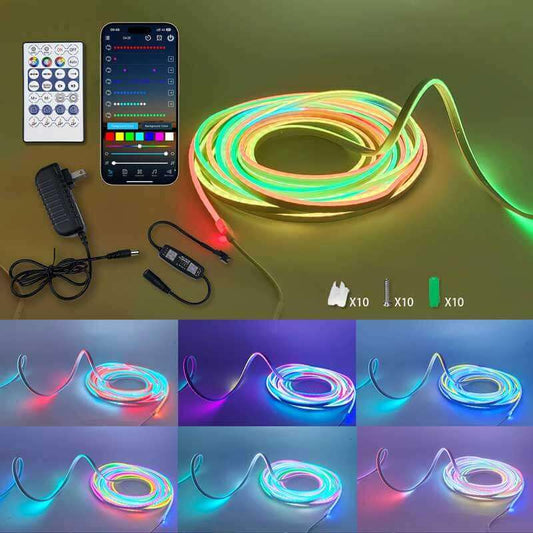
- Turn on the power to check that the lights are working properly. Adjust the color and brightness settings if your strip has smart capabilities or a remote control.
Optional Step: Use Mounting Clips for Extra Security
- For added security, or if you have concerns about the adhesive over time, you can use mounting clips or small hooks. These can be placed at intervals along the LED strip to hold it in place.
Tips for a Successful Installation:
- Choose the Right LED Strip: Ensure your LED strip has enough brightness for the space and is long enough for the area where you want to install it.
- Check for Smart Features: If you want to control the lights with a smartphone app or remote, make sure your LED strip has smart functionality.
- Allow Time for Adhesive to Set: If you’re using adhesive backing, it might take some time to fully stick. Try not to disturb it for the first few hours after installation.
- Consider a Timer or Dimmer: If your LED strip supports it, set it up with a timer or dimmer to create the desired lighting effects.
Where to Buy LED Strips for Ceiling Installation:
- Amazon: Offers a variety of LED strips with adhesive backings. LED Strip Lights on Amazon
- Home Depot: Great for DIY projects, including ceiling installation kits. Home Depot LED Strips
- B&Q (UK): Good for affordable lighting options. B&Q LED Strip Lights
YouTube Channel for Guidance
To see a live demonstration of how to set up LED strip lights on your ceiling, check out these YouTube channels:
- DIY Creations - Offers detailed guides on DIY lighting and home projects.
- Govee Official Channel - Features tips and tricks for installing Govee smart LED strips.
- The Lighting Outlet - Provides tutorials on various lighting installation methods, including LED strips.
Here’s a YouTube link to a helpful video:
How to Install LED Strip Lights on the Ceiling
Conclusion:
Sticking LED strip lights to the ceiling is an easy, low-cost project that you can complete in just a few hours. By following these steps and using minimal materials, you can enhance the look of your room with beautiful ambient lighting. Whether you're creating a cozy atmosphere or highlighting architectural features, LED strip lights are a great way to elevate your space.


