How do you put lights on the edge of a roof?
Partager
Adding lights along the edge of your roof, often called roofline lighting, can create an elegant and eye-catching effect, especially at night. This type of lighting is typically used for aesthetic enhancement, security, or highlighting architectural features. There are several ways to install lights along the roofline, depending on the type of lights you're using and the look you want to achieve.
Here’s a step-by-step guide for installing lights on the edge of a roof:
1. Choose the Right Lights for the Roof Edge
Types of Lights:
- LED Rope Lights: Flexible, ideal for wrapping around the edge.
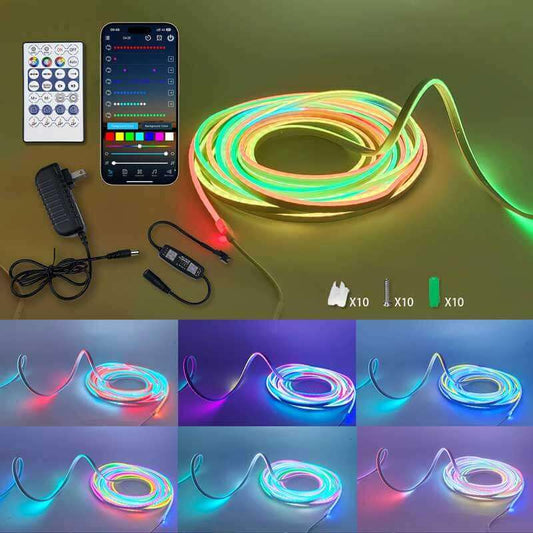
- LED Strip Lights: Can be mounted discreetly under the eaves or fascia.
- String Lights: If you want a more decorative look, outdoor-rated string lights can be strung along the edge.
- Clip-on Roofline Lights: These are designed for easy installation and often come with built-in hooks to clip them onto the roof.
- Spotlights or Floodlights: Mounted along the roofline to highlight the roof, walls, or other features.
- Smart Lights: For more customization, consider smart LED lights that change colors or brightness via a mobile app or voice control.
2. Plan the Layout
- Measure the Length: Measure the perimeter or roofline where you want to place the lights to determine how many lights or how much lighting you need.
- Determine Placement: Decide if you want the lights to sit on top of the fascia, under the soffit, or along the edge of the roof. Under-eave lights are more subtle, while lights placed along the fascia or edge create a bolder effect.
- Consider Gutter and Downspouts: Ensure that your lights won't obstruct gutters or downspouts. If needed, make sure the lights are installed slightly above the gutters.
3. Gather Materials & Tools
Materials you will need:
- Roof Edge Lights (LED strips, rope lights, clip-on lights, or string lights)
- Mounting Clips or Adhesive Hooks (if applicable)
- Outdoor Extension Cords (if needed)
- Power Source: You may need an outdoor-rated power strip or outlet.
- Screwdriver, Drill, and Screws (if needed)
- Ladder or Extension Ladder: For safely reaching the roof edge.
- Waterproof Electrical Tape: To secure connections if needed.
4. Install Power Supply
- Plug-in vs. Hardwired: If you're using plug-in lights (like string lights or LED strips), you'll need a weatherproof outdoor outlet. You can install the outlet in a convenient location or use an extension cord from an existing outdoor outlet.
- Hardwired Lights: If you want to go the professional route, you can hardwire the lights into your electrical system. This is best done by a licensed electrician.
5. Install the Lights
For LED Rope Lights or Strip Lights:
-
Install Mounting Clips or Adhesive Strips: Depending on the type of light, you may need to install clips or adhesive strips to secure the lights to the roof edge.
- Clip-on lights are typically attached directly to the edge of the roof or fascia, where they will stay in place.
- Adhesive strip lights (for LED strips) may require you to clean the surface before installation, ensuring the strip adheres properly.
- Run the Lights Along the Roof Edge: Start at the power source and work your way around the roofline, securing the lights as you go.
- Secure with Fasteners or Clips: For a more secure installation, use fasteners or clips designed for mounting rope or strip lights to prevent sagging or movement in high winds.
For String Lights:
- Install Hooks or Clips: Use outdoor hooks or clips designed for string lights. These can be attached along the edge of the roofline, fascia, or under the soffits.
- Hang the Lights: Hang the lights evenly spaced along the roofline, ensuring they are securely clipped.
- Use Extension Cords: If the string lights aren’t long enough, use outdoor-rated extension cords to reach the power source. Make sure all connections are waterproof.
For Spotlights or Floodlights:
- Install Mounting Brackets: If you’re using spotlights or floodlights, install the mounting brackets on the roof edge or fascia.
- Secure the Lights: Attach the light fixtures to the brackets and point them in the direction you want to illuminate.
- Connect to Power: Ensure the power connections are safe and weatherproof.
6. Test the Lights
- Check for Functionality: Once the lights are installed, plug them in and test them to ensure they’re working properly.
- Adjust if Needed: Adjust the angle or placement of the lights for the best effect.
7. Weatherproofing and Safety Considerations
- Weatherproof Connections: Use waterproof electrical connectors and electrical tape to seal connections and prevent moisture from damaging the lights or wiring.
- Use Outdoor-Rated Lights: Ensure all lights and equipment are rated for outdoor use, especially if they’ll be exposed to rain, snow, or wind.
- Check the Wiring: Make sure that no wires are exposed to the elements or at risk of getting frayed. If necessary, use outdoor-rated conduit to protect any exposed wiring.
8. Optional: Add Motion Sensors or Timers
- Motion Sensors: To enhance security, you can install motion sensors with your roof edge lights. These will automatically turn on the lights when motion is detected.
- Timers: Use timers to turn the lights on and off at set times, ensuring they don’t run all night and help save energy.
Conclusion:
Installing lights along the edge of your roof can dramatically enhance your home's exterior appearance, increase security, and provide useful illumination. Whether you’re using LED strips, string lights, or spotlights, careful planning and proper installation are key to creating a safe, efficient, and beautiful lighting system. By following these steps, you’ll be able to install lights on the roof edge that not only look great but are also durable and functional.


