How to fit LED strip lights in kitchen UK?
Partager
Fitting LED strip lights in your kitchen is a great way to improve both the functionality and ambiance of the space. Whether you're installing them under cabinets, above countertops, or as accent lighting, LED strips provide energy-efficient, customizable lighting solutions. Here's a step-by-step guide on how to fit LED strip lights in your kitchen in the UK:
What You’ll Need:
- LED strip lights (ensure they are rated for the type of installation you have in mind – under-cabinet, ambient, etc.)
- Power supply (transformer) for converting 240V mains power to 12V or 24V DC.
- 3-pin UK plug (if your power supply doesn't have one pre-fitted).
- Double-sided tape or mounting clips (to secure the LED strip in place).
- Wire connectors (if you need to join multiple strips).
- Scissors (to cut the LED strip to the correct length, if needed).
- Soldering iron (optional, for more permanent connections).
- Cable clips or clamps (to tidy up and secure wiring).
- Cleaning supplies (such as a cloth and some rubbing alcohol for surface prep).
- Electrical tape or heat shrink tubing (for insulation).
Step 1: Plan the Placement
Before you begin, decide where you want to place the LED strips. Common locations include:
- Under Cabinets: To illuminate countertops and provide task lighting.
- Above Cabinets: To create ambient lighting or highlight shelves.
- Inside Cabinets: For lighting glass-fronted cupboards or display areas.
- Under Toe Kicks: For a subtle, ambient glow at the bottom of the cabinets.
- Above the Sink: To provide extra light for tasks like washing dishes or food prep.
Make sure the length of the LED strip matches the area you want to cover. Measure the space accurately to avoid cutting strips unnecessarily.
Step 2: Clean the Surface
To ensure a strong bond between the LED strip and the surface, clean the area where you'll attach the LED strip. This helps the double-sided tape (which most LED strips come with) adhere properly.
- Use a soft cloth to remove any dust or grease.
- Wipe the surface with some rubbing alcohol to remove any residual oils or dirt.
- Allow the surface to dry completely before applying the LED strip.
Step 3: Cut the LED Strips to Length
LED strips can typically be cut every 3 to 5 LEDs (there will usually be a marked line to guide where to cut). Cut the strip to the desired length using scissors.
- Be careful not to cut through the soldered joints or the copper contacts, as this could damage the strip.
- If you need to join multiple strips together, use connectors or soldering to link the strips.
Step 4: Attach the LED Strips
Most LED strips come with self-adhesive backing. Peel off the protective backing to reveal the adhesive side, and then:
- Start at one end of the strip and gently press it onto the clean surface.
- For under-cabinet installation, place the strip along the edge of the cabinet, facing downward or at a slight angle to illuminate the countertop.
- Ensure the strip is straight as you apply it, using a ruler or measuring tape to guide you if needed.
- Press the strip firmly into place to ensure the adhesive sticks well.
If your LED strips do not have adhesive backing, use mounting clips or brackets to hold the strips in place.
Step 5: Connect the LED Strip to the Power Supply
After positioning and securing the LED strip, you’ll need to connect it to the power supply (transformer) to convert 240V mains power to the correct low-voltage DC current for the LED strips.
- Cut the wire that came with the LED strip to the appropriate length, if necessary.
- Connect the positive (red) and negative (black) wires from the LED strip to the corresponding terminals on the power supply (12V or 24V DC output, depending on your LED strip).
- If you’re joining multiple strips, use connectors or soldering to join the strips together. Ensure that all connections are properly insulated to avoid short circuits.
For safety:
- Use a power supply that matches the voltage and wattage requirement of the LED strip.
- If you're using a UK mains plug, connect the power supply to a three-pin plug and make sure to wire the live (brown) and neutral (blue) wires correctly.
Step 6: Install the Power Supply
Once the LED strip is connected to the power supply, you need to plug the power supply into the mains.
- Position the power supply somewhere discreet but accessible. It should be near an electrical outlet and not obstructed.
- If the power supply is wall-mounted, use screws to secure it to the wall or a cabinet.
- Plug the power supply into a socket and turn on the power.
Step 7: Test the Lights
Once everything is connected, switch on the power to ensure the LED strip lights up.
- Check the brightness and color: LED strips can be dimmable or offer adjustable color settings depending on the type you have.
- If the LEDs flicker or don’t work, check the connections to ensure they’re secure and correctly wired.
- For dimmable LED strips, test the dimming function if you have a compatible dimmer switch.
Step 8: Tidy Up the Wiring
- Use cable clips or mounting brackets to secure any visible wires. This keeps the installation looking neat and prevents tripping hazards or damage to the wires.
- Route cables carefully around corners or edges, avoiding any sharp bends to ensure the wiring remains intact and safe.
Step 9: Optional – Add Smart Control
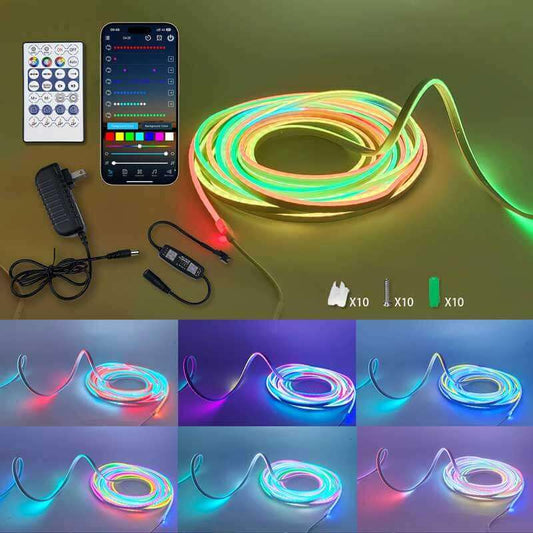
If you want to control your LED strips remotely or integrate them with other smart devices, consider adding a smart LED controller. This allows you to:
- Control brightness, colors, and effects using a mobile app.
- Sync the lights with music or voice assistants like Alexa or Google Assistant.
- Set timers or schedule lighting changes.
Step 10: Enjoy Your New Kitchen Lighting!
Now that everything is installed and working, sit back and enjoy your new LED lighting setup. Whether you’ve added task lighting, ambient lighting, or accent lighting, LED strips can transform your kitchen into a more functional and visually appealing space.
Safety Considerations
- Always ensure your LED strips and power supplies are rated for UK mains voltage (240V AC) and meet the necessary safety standards.
- Don’t overload the power supply: Check that the total wattage of your LED strips does not exceed the output of the power supply.
- Turn off the power before working with electrical connections to avoid shock hazards.
- If you’re unsure about any aspect of the installation, consult a qualified electrician to ensure safety.
With these steps, you can install LED strips in your kitchen with ease and achieve stunning lighting effects that will elevate the look and feel of your space. Let me know if you need recommendations for LED strips or power supplies for your kitchen project!


